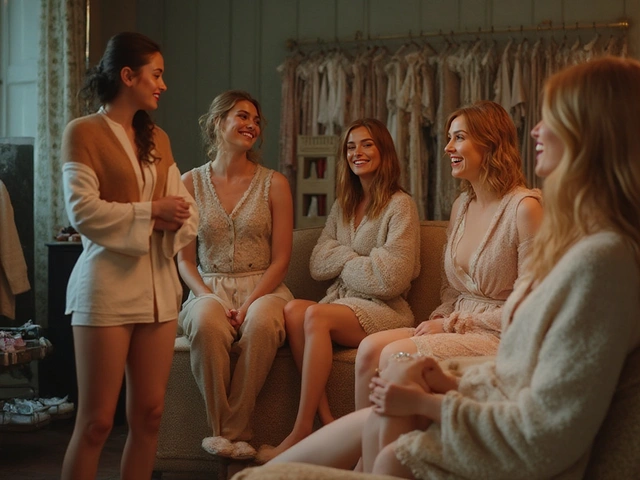
When you step in front of the camera, your body becomes the story. A great model pose doesn’t just look good-it communicates emotion, power, grace, or attitude in a single frame. But here’s the truth: most people think posing is natural. It’s not. Even the most experienced models spend hours practicing in front of mirrors, watching tutorials, and tweaking angles. If your photos look stiff, awkward, or flat, it’s rarely because you’re not photogenic. It’s because you haven’t learned the mechanics of posing.
Why Posing Matters More Than You Think
Photography is about control. The photographer controls light, composition, and timing. But you? You control the energy. A slight tilt of the head, the curve of a wrist, the angle of your shoulders-these tiny adjustments turn a snapshot into a statement. Think about it: two people standing in the same spot, wearing the same outfit, with the same lighting. One looks like a Vogue cover. The other looks like they’re waiting for a bus. The difference? Posing.
It’s not about looking perfect. It’s about looking intentional. Every professional shoot-from high fashion to commercial ads-relies on poses that guide the viewer’s eye. A strong pose makes the viewer pause. A weak one makes them scroll.
The Three Pillars of Great Model Poses
There’s no single formula, but every powerful pose follows three basic rules:
- Lines create movement-Avoid straight, rigid shapes. Use curves, angles, and diagonals to lead the eye. Your spine should never be perfectly vertical unless you’re going for a statuesque look.
- Weight distribution tells a story-Shift your weight to one leg. It creates natural tension. If both feet are flat and even, you look like a mannequin.
- Hands are not afterthoughts-They’re part of the composition. Fingers should never look dead or awkward. A relaxed hand with slightly curved fingers reads as natural. Clenched fists or stiff palms scream “I don’t know what to do.”
These aren’t just tips. They’re the foundation. Master these, and you can adapt to any style-runway, editorial, lingerie, or streetwear.
5 Essential Poses for Every Model
Here are five go-to poses that work across genres. Practice them in front of a mirror until they feel automatic.
1. The S-Curve
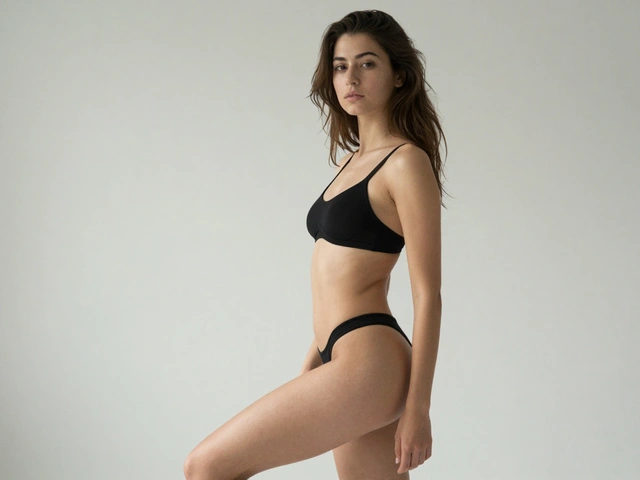
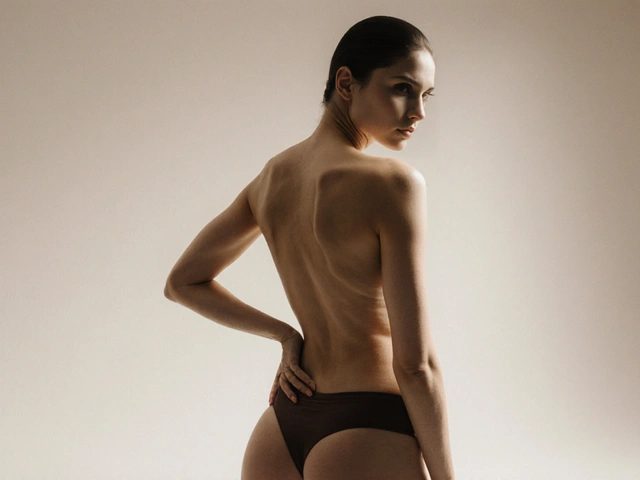
This is the classic pose for feminine grace. Start by standing with your weight on one leg. Bend your knee slightly. Tilt your hips away from that leg, then rotate your shoulders in the opposite direction. Now gently arch your spine-not too much, just enough to create a soft S shape from head to toe. Your arms should flow naturally: one hand lightly resting on your hip, the other trailing down your thigh or reaching toward your hair. This pose elongates your body and adds rhythm.
2. The Lean
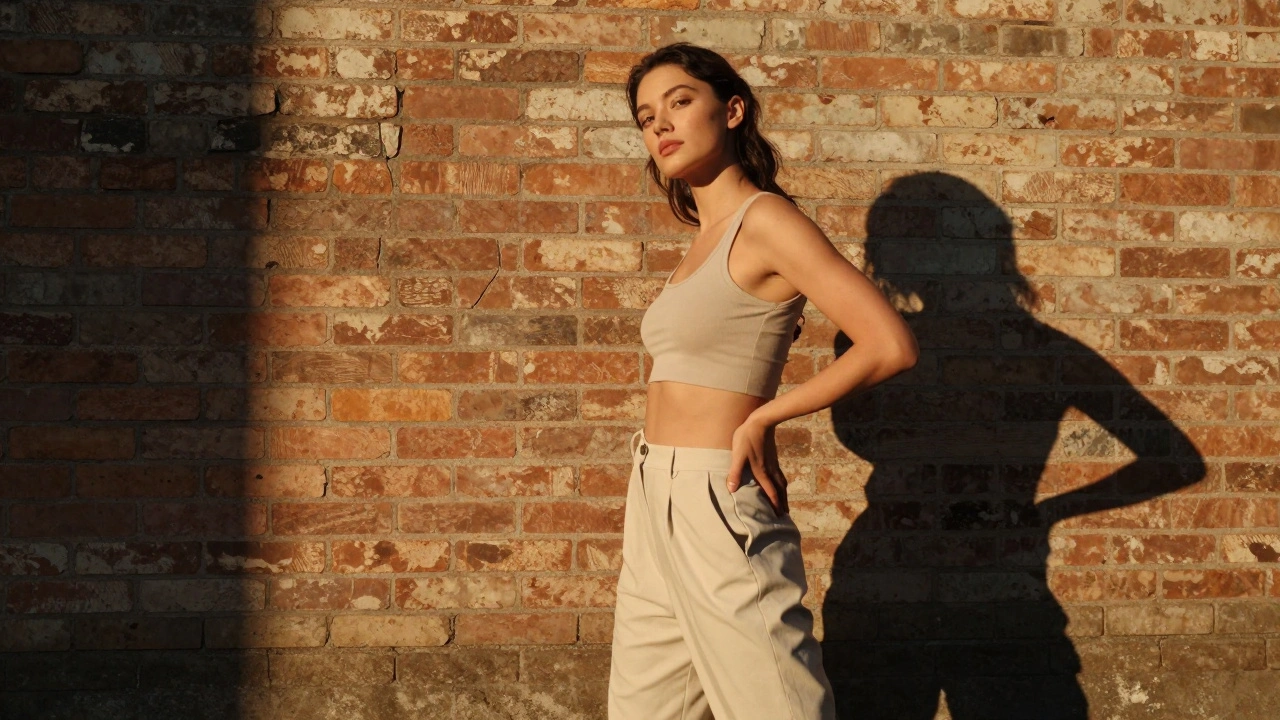
Perfect for casual, confident shots. Stand sideways to the camera. Lean your torso slightly forward, keeping your back straight. Let one foot cross slightly in front of the other. Rest one hand on your hip or a nearby surface-a wall, a chair, a railing. Keep your shoulders relaxed but angled toward the camera. Your head should tilt just a touch, as if you’re thinking about something interesting. This pose feels effortless but reads as powerful.
3. The Sit-and-Twist
Great for editorial or lifestyle shots. Sit on the edge of a bench, stool, or stairs. Cross one ankle over the other. Twist your upper body 45 degrees toward the camera. Let one arm rest on your knee, the other drape behind you. Keep your spine long. Don’t slump. The twist creates dimension, and the crossed legs add visual interest without blocking your shape.
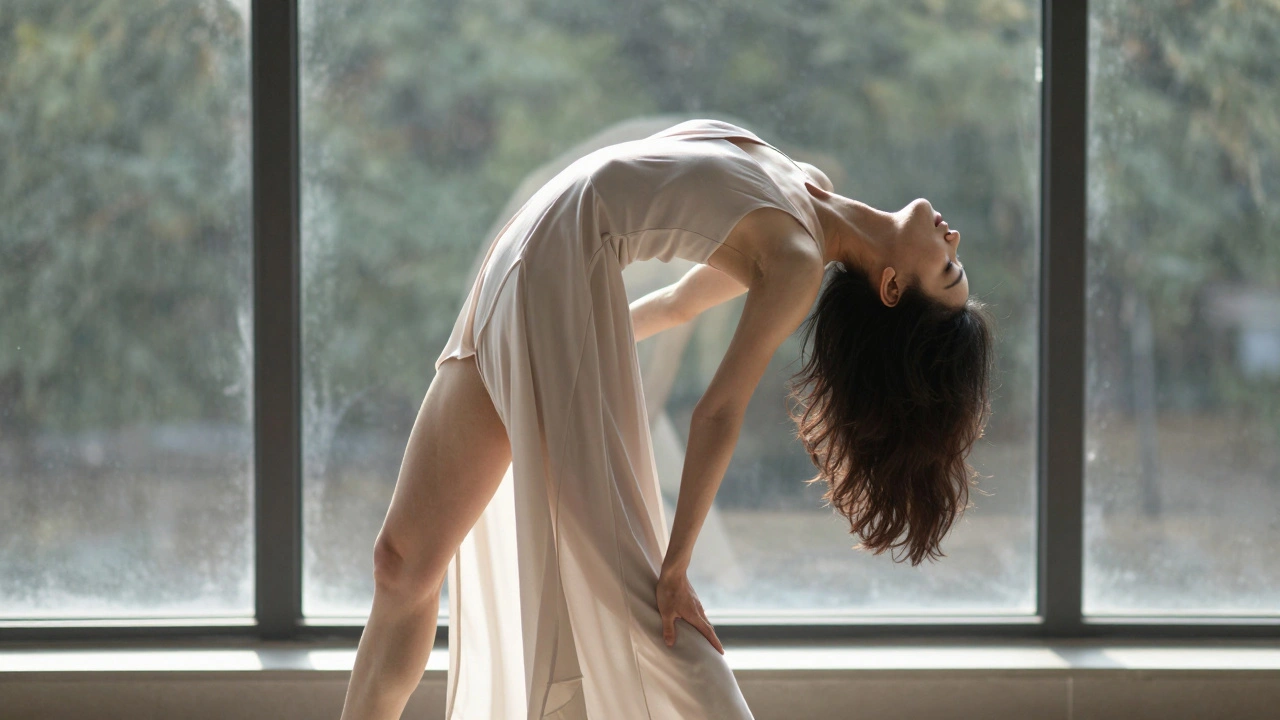
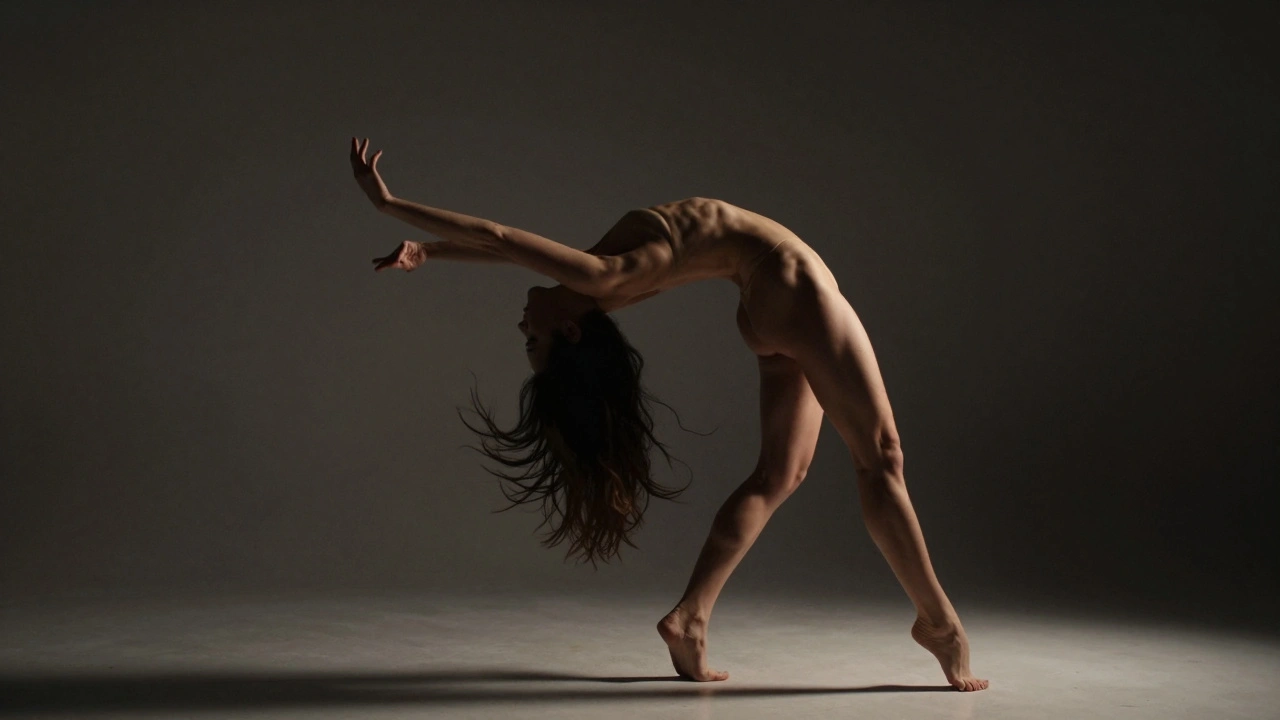
4. The Back Arch
Use this for dramatic, high-fashion moments. Stand with your feet shoulder-width apart. Slowly arch your back, lifting your chest and tilting your head back. Keep your arms extended overhead or one hand resting lightly on your lower back. Don’t overdo the arch-your lower back should feel engaged, not strained. This pose emphasizes silhouette and works best with strong lighting that highlights your form.
5. The Walk-Off
Perfect for motion shots or candid energy. Take three steps forward, then freeze mid-stride. Let one arm swing naturally, the other rest at your side. Turn your head slightly over your shoulder. Your front foot should be flat, your back heel lifted. This isn’t about speed-it’s about capturing the moment between steps. It looks alive.
Common Posing Mistakes (And How to Fix Them)
You’ve seen them. Everyone has. Here are the five most common errors-and how to avoid them.
- Chicken arms-When your elbows stick out like wings. Fix: Bend your elbows slightly and keep your hands in front of your body, not at your sides.
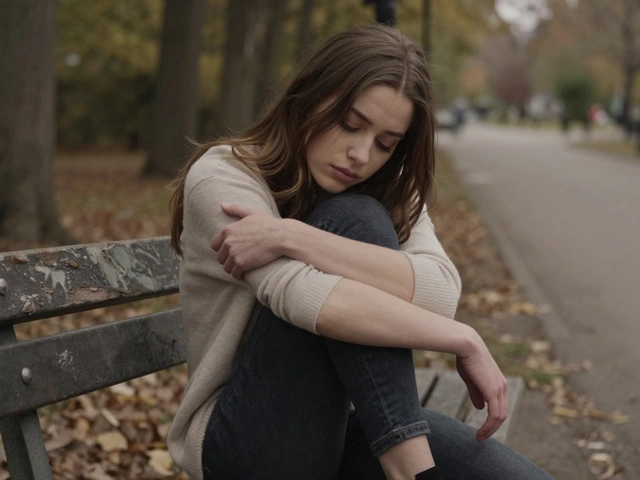
- Dead eyes-Staring blankly at the lens. Fix: Look just past the camera, or imagine someone you trust is standing behind it. Let your expression follow your emotion.
- Flat feet-Both feet planted equally. Fix: Shift your weight. Lift one heel. Point your toes. Even a small shift adds life.
- Over-smiling-Forced, wide grins that look unnatural. Fix: Soften your mouth. A slight smile, a raised eyebrow, a knowing glance-these read as more authentic.
- Ignoring the background-Posing without considering what’s behind you. Fix: Always check for clutter, awkward lines, or objects that cut through your body (like poles or tree branches). A clean background lets your pose shine.
How to Practice Without a Photographer
You don’t need a pro shoot to get better. You need consistency.
Set up your phone on a tripod or stack books to hold it steady. Use the timer. Take 10 photos a day-no excuses. Try one new pose each day. After a week, review them. Ask yourself: Which ones feel real? Which ones look stiff? What’s the difference?
Watch videos of top models on runway shows. Pause them. Study their posture. Notice how they hold their shoulders, where their fingers rest, how they breathe. Then copy it. Don’t just watch-imitate. Record yourself doing the same pose. Compare. Adjust.
Practice in different lighting. Natural light near a window. Backlighting at sunset. Harsh studio light. Each changes how your body looks. Learn to adapt.
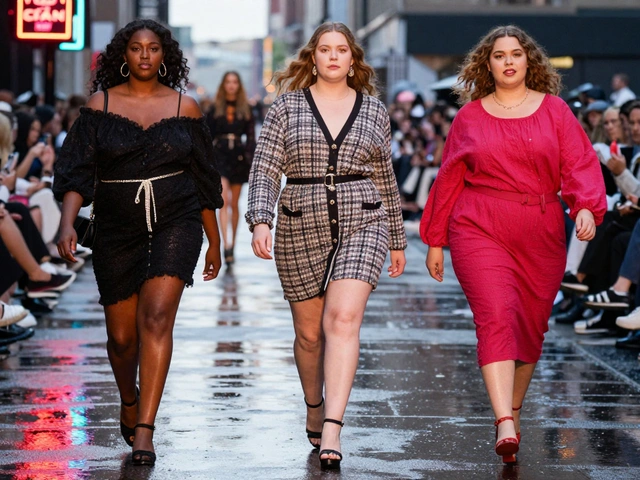
Posing for Different Styles
Not every pose works for every look. Here’s how to adjust:
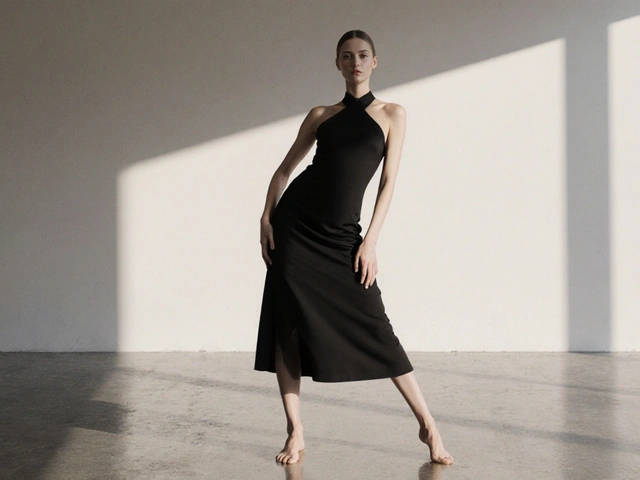
- High Fashion-Go sharp. Angular. Dramatic. Think sharp elbows, tilted heads, intense gazes. Less movement, more sculptural.
- Commercial-Be approachable. Smile softly. Keep poses open and relaxed. Avoid extreme angles. You want people to feel like they could buy what you’re wearing.
- Lingerie / Glamour-Emphasize curves without being overt. Use the S-curve and lean. Keep hands gentle. Focus on skin texture and light on the body.
- Streetwear / Lifestyle-Look like you’re living. Move naturally. Lean against walls. Put hands in pockets. Laugh. Look away. Authenticity beats perfection here.
Final Tip: Breathe
Most models forget this. You’re not a statue. You’re a person. When you hold a pose too long, your body tenses. Your face tightens. Your eyes glaze over. That’s when you look fake.
Take a slow breath in. Exhale as you adjust. Breathe through the pose. It relaxes your muscles, softens your expression, and makes your energy feel real. Even the most complex poses feel natural when you’re breathing.
Great posing isn’t about looking like someone else. It’s about becoming the version of yourself that the camera loves. Practice. Observe. Adjust. And remember-every great model started with stiff arms and awkward smiles. They didn’t give up. They kept showing up.
What’s the best pose for beginners?
Start with the Lean. It’s simple, versatile, and works for almost any outfit or setting. Stand sideways, shift your weight to one leg, lean your torso slightly forward, and rest one hand on your hip. Keep your shoulders relaxed and your head turned just a little toward the camera. It looks effortless, feels natural, and instantly improves your photos.
How do I avoid looking stiff in photos?
Stiffness comes from holding your breath or overthinking. Before each shot, take a deep breath and let it out slowly. Move slightly between poses-shift your weight, wiggle your fingers, blink. Let your body feel alive. Also, don’t stare at the camera like a robot. Look just past it, or imagine you’re talking to a friend. Authenticity beats perfection every time.
Should I always smile in model photos?
No. Smiling is just one expression. Many high-fashion and editorial shots use neutral or serious expressions because they convey more mystery or power. The key is to match your expression to the mood of the shoot. If you’re unsure, ask the photographer. A slight smile, a raised eyebrow, or a quiet gaze can be more impactful than a big grin.
Can I use posing apps or tools to improve?
Yes, but use them wisely. Apps like PoseMyShot or Model Poses offer visual references, which can help you understand angles and body positioning. But don’t copy them exactly. Use them as inspiration, not a template. Real posing comes from feeling your body, not following a picture. The best models adapt poses to their own shape and style.
How long does it take to get good at posing?
You’ll see improvement in a week if you practice daily. But true mastery takes months. Think of it like learning an instrument. The first few tries feel awkward. After 30 days of consistent practice-10 minutes a day-you’ll notice your body starts to move more naturally in front of the camera. After six months, you’ll be able to adapt to any direction without hesitation.


December 2, 2025 AT 18:35
Himanshu Parmekar
Look, I get it. You think you're teaching people how to pose, but this is just recycled Pinterest garbage. Everyone knows the S-curve. Everyone knows not to have chicken arms. This isn't insight, it's a Wikipedia page with better formatting. If you're actually trying to help models, you'd stop treating them like mannequins and start treating them like humans. But hey, I guess that's too much work.
December 3, 2025 AT 20:15
Nasir Khan
Good breakdown of the fundamentals. The three pillars are spot on-lines, weight, hands. Many beginners miss how much the hands contribute to the overall tone. I’ve seen people spend hours on lighting and wardrobe but then leave their hands dangling like dead fish. Practice with a mirror, yes, but also record yourself. Watch how your fingers move when you’re relaxed. That’s where authenticity lives.
December 5, 2025 AT 01:15
Jeff Brainard
posing is just another way we try to control the chaos of being alive
we think if we angle our shoulders just right the universe will notice us
but the camera doesn't care about your s-curve
it just captures the silence between breaths
December 5, 2025 AT 21:52
Kumar Manickam
I tried practicing the Lean pose every day for a week and honestly it changed everything. I used to hate how I looked in photos, felt like a robot. Now I catch myself doing it naturally even when I'm not posing-leaning against the fridge, waiting for the bus. It’s not about looking perfect, it’s about feeling like you belong in your own body. Also, breathing through it? Game changer. I didn’t even realize I was holding my breath until I started doing this. Seriously, try it for 10 days. You’ll thank yourself.
December 7, 2025 AT 19:47
adam denature
you say shift your weight but you dont say which leg to use or why
you say dont stare at the camera but dont explain how to look past it
you say breathe but never mention exhaling on the shot
this is not advice its a list of buzzwords with no real guidance
and why are you using so many line breaks
December 7, 2025 AT 20:50
Honey Syal
Okay but can we talk about how the entire post assumes you have a tripod, a mirror, and the luxury of practicing 10 photos a day? What about people who work two jobs, don’t have a quiet space, and just want to look decent in their kid’s school photo? The tone here is so ‘I have a studio and a stylist’ it’s alienating. Not everyone’s chasing Vogue. Some of us just want to look like we didn’t roll out of bed at 7am.
December 9, 2025 AT 19:26
Gail Montefalco
You missed the most important thing: if you’re not a size 0 and you’re not white, none of this matters. The camera still sees you as ‘awkward’ no matter how many S-curves you do. This whole thing is just a beauty-industry fantasy dressed up as ‘tips.’ And don’t even get me started on the ‘soft smile’ advice-when was the last time a Black woman was told to ‘soften her expression’ and not be ‘intimidating’? This isn’t posing. It’s assimilation.
December 10, 2025 AT 02:51
Hallesha Williams
you say 'hands are not afterthoughts' but then you say 'relaxed hand with slightly curved fingers'... what does that even mean? how slightly? who defines slightly? and why are you assuming everyone has the same hand shape? i have big knuckles and short fingers and your advice makes me look like a confused crab. this whole thing is so privileged. also you spell 'photogenic' wrong in the intro. i'm not even mad, just disappointed.
December 11, 2025 AT 15:27
akarsh chauhan
While the intent of this exposition is commendable, the linguistic register employed is excessively colloquial and lacks the requisite scholarly rigor expected of a pedagogical treatise. Furthermore, the absence of peer-reviewed citations, anatomical diagrams, or references to established kinesiological literature renders the content epistemologically unsound. One cannot effectively instruct posture without recourse to the foundational principles of biomechanics.
December 12, 2025 AT 07:05
Rupesh Deore
Ive been doing this for years and none of this is new. just stop overthinking it. your body knows what to do. just move. breathe. be there. thats it.