When you're behind the camera, a model’s pose can make or break a shot. It’s not just about where they stand-it’s about energy, flow, and connection. Even the best lighting and gear won’t save a stiff, unnatural pose. The right pose tells a story before the shutter even clicks. Whether you're shooting fashion, editorial, or portraits, knowing the top 10 model poses gives you control, confidence, and consistency. These aren’t just trends-they’re timeless tools used by pros for decades.
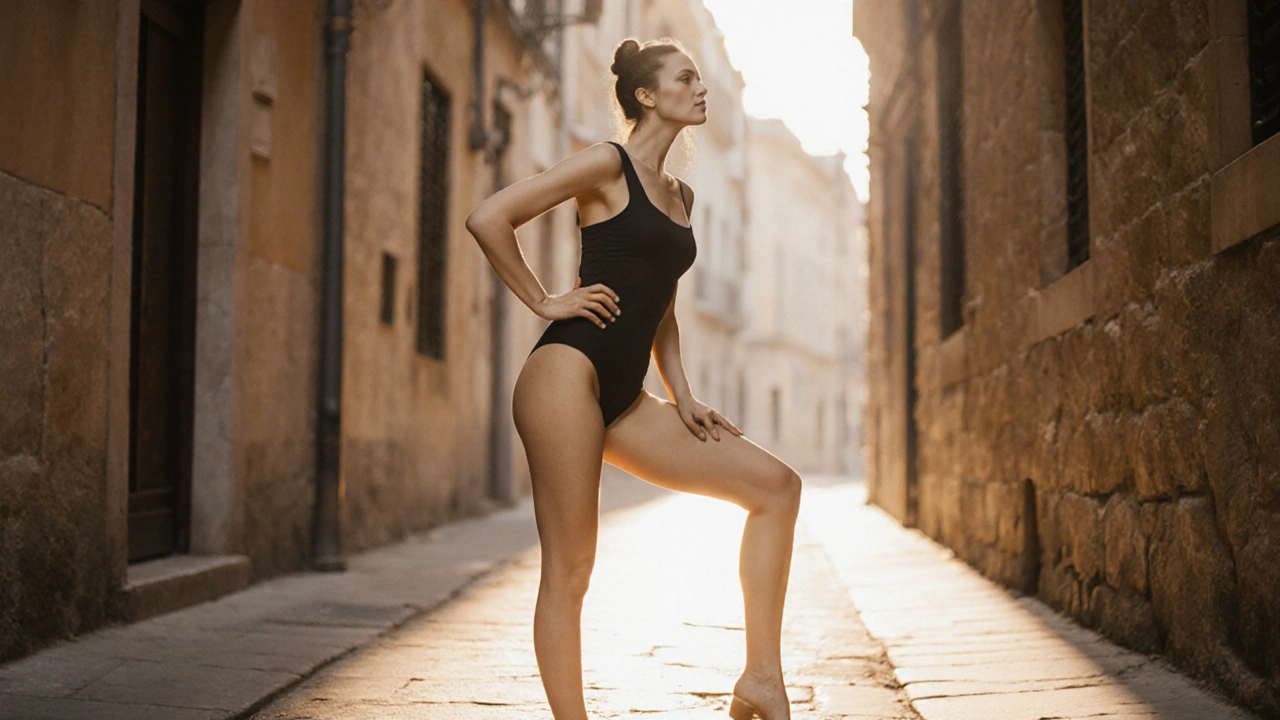
1. The Classic Contrapposto
This pose has been around since ancient Greek sculpture, and for good reason. The model stands with most of their weight on one leg, letting the other leg relax slightly. The hips tilt, shoulders counterbalance, and the body forms a gentle S-curve. It looks effortless, even when it’s carefully constructed.
Try this: Ask the model to shift their weight to the right foot, let the left knee soften, and turn their torso 30 degrees toward the camera. Add a slight tilt of the head and one hand resting on the hip. Instant elegance. This pose works for everything from high fashion to lifestyle shoots. It flatters the waist, elongates the legs, and adds movement without looking forced.
2. The Over-the-Shoulder Glance
This is the go-to for emotional, cinematic shots. The model turns their body away from the camera, then looks back over their shoulder. The key is in the timing-the glance should feel spontaneous, not staged.
Use this when you want to suggest mystery or intimacy. Pair it with soft natural light coming from the side. Have the model slightly lift their chin and relax their jaw. A loose strand of hair falling across their face adds texture. This pose is a favorite in editorial spreads and brand campaigns because it draws the eye into the model’s expression without being overly dramatic.
3. The Seated Lean
Not every shoot needs the model standing. The seated lean is one of the most versatile poses for casual, grounded shots. Have the model sit on the edge of a chair, bench, or stair. One leg bent, the other extended slightly. Lean forward from the hips, resting hands on knees or propping up with one arm.
This pose feels natural and relatable. It works for streetwear, beauty, and even corporate portraits. The trick? Avoid slouching. Keep the spine straight, shoulders back, and head lifted. The lean should come from the waist, not the neck. Add a slight twist in the torso to break symmetry and create visual interest.
4. The Walking Motion
There’s a reason fashion shows never stop moving. Capturing motion in still photography adds life. Ask the model to walk naturally toward or past the camera, then snap a frame mid-stride.
Use a fast shutter speed (1/500s or faster) to freeze the motion without blur. Focus on the moment when one foot is fully planted and the other is just leaving the ground. Let their arms swing naturally-don’t force them into stiff positions. This pose works best with wind, flowing fabric, or a dynamic background. It’s perfect for runway-inspired editorials and lifestyle brands that want to feel active and energetic.
5. The Hands-in-Hair
This is one of the most requested poses for beauty and glam shoots. It’s intimate, soft, and universally flattering. The model gently runs their fingers through their hair, pulling it slightly away from the face or letting it cascade down the neck.
Don’t let the hands look stiff. Fingers should be relaxed, not clenched. The gaze should be soft, looking slightly away or down. This pose works best with backlighting to highlight hair texture. Avoid having the model tug too hard-it looks painful, not pretty. A little tension in the neck and shoulder adds realism. It’s a staple in magazine covers and makeup campaigns for a reason: it draws attention to the face without being obvious.
6. The Propped-Up Elbow
Whether the model is sitting on the floor, lying on a couch, or perched on a ledge, the propped-up elbow is a simple way to create depth and structure. Resting the weight on one elbow shifts the body’s center of gravity and opens up the chest and shoulders.
Have the model rest their elbow on a surface slightly below shoulder height. Let the other arm dangle naturally or rest gently on the thigh. The head should tilt slightly toward the camera. This pose is great for close-ups and intimate portraits. It works with both men and women, and adapts easily to different clothing styles-from suits to sweaters to swimwear.
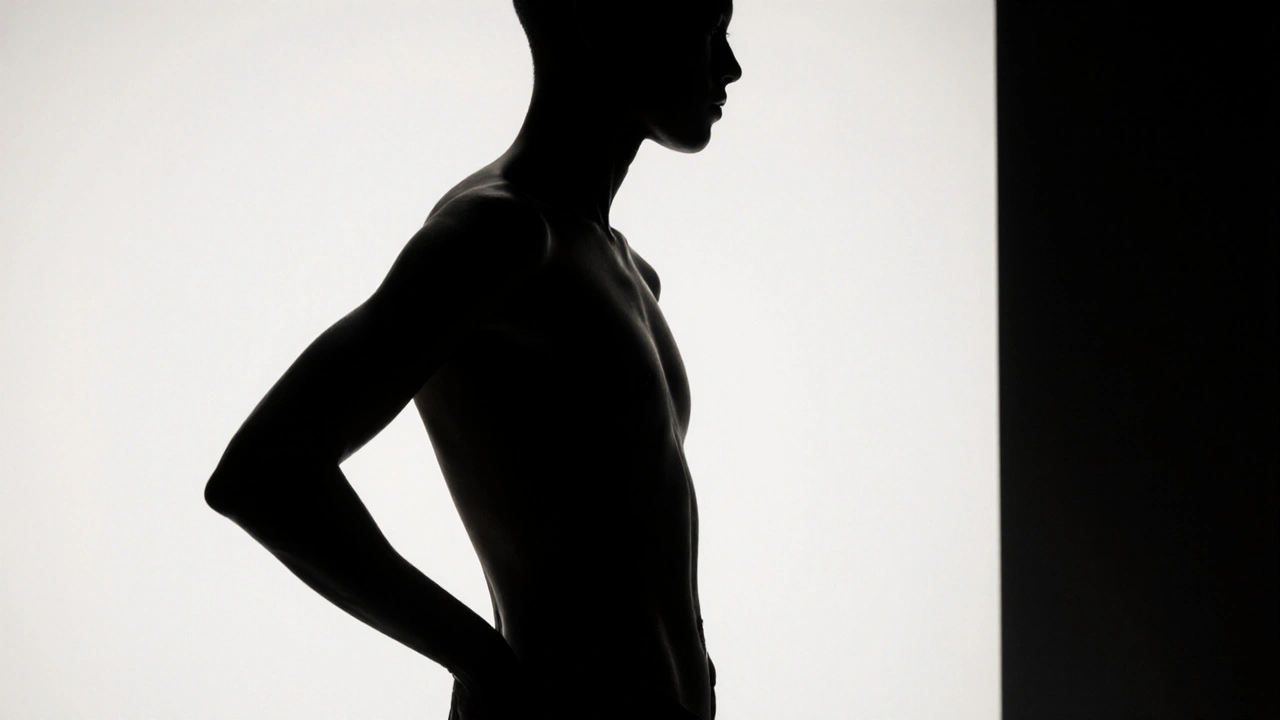
7. The Back Arch (Cat Stretch)
This pose highlights curves and creates a strong silhouette. The model stands or kneels with their back arched, chest lifted, and head tilted back. It’s often used in fitness, swimwear, and boudoir photography.
Be careful not to overdo it. A subtle arch is more powerful than a dramatic one. The goal is to elongate the spine, not strain it. Have the model engage their core to avoid collapsing in the lower back. Arms can reach overhead, rest on the hips, or trail behind. This pose looks best with directional lighting that sculpts the body’s shape. It’s a favorite among fitness brands because it shows strength and flexibility without being overtly sexual.
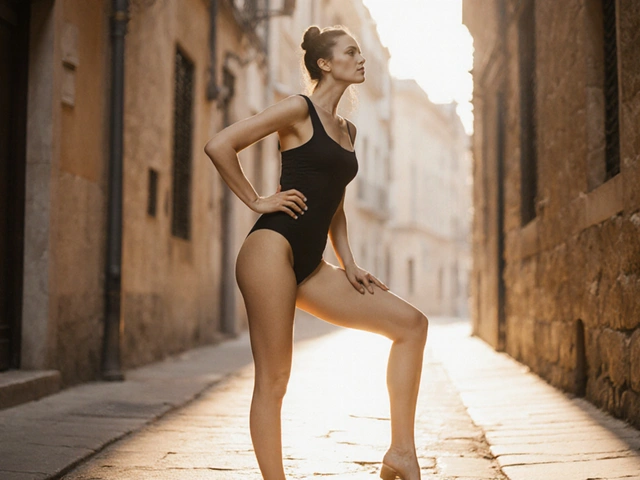
8. The Crossed Legs (Sitting or Standing)
Crossed legs instantly add polish to any pose. When sitting, the model crosses one ankle over the opposite knee. When standing, they cross one leg behind the other at the ankle. Both versions slim the silhouette and create clean lines.
For sitting: Keep the back straight, shoulders relaxed. The crossed leg should be slightly lifted, not dragging on the floor. For standing: The crossed leg should be behind, not in front-it avoids blocking the body’s shape. Add a slight hip tilt to enhance the curve. This pose is perfect for business portraits, editorial fashion, and even family photos. It’s subtle, classy, and universally flattering.
9. The Hand-on-Head
This pose conveys thoughtfulness, confidence, or playfulness-all depending on the expression. The model places one hand gently on the side of their head, fingers lightly touching the temple or hairline.
It’s a great way to frame the face without covering it. Avoid pressing too hard-it looks like a headache. The elbow should be slightly bent, not locked. Pair this with a soft smile or a thoughtful gaze. Works beautifully in beauty shots, hair campaigns, and casual streetwear. The hand adds a human touch, making the image feel more personal and less staged.
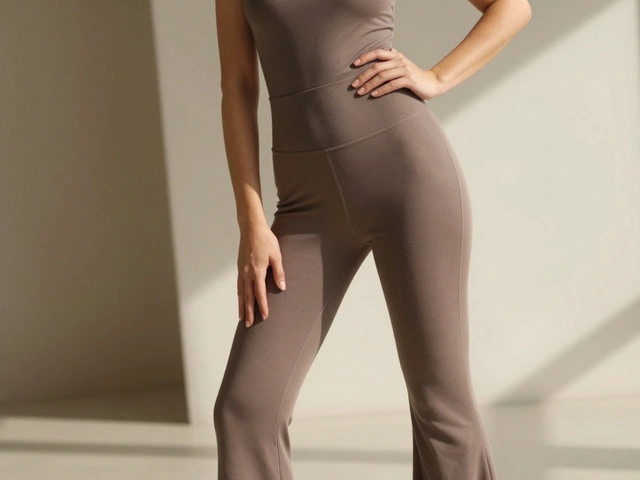
10. The Full-Body Profile
Nothing shows off line, shape, and proportion like a clean profile. The model stands sideways to the camera, shoulders and hips aligned, arms relaxed. One hand can rest on the hip, the other hanging naturally.
This pose is essential for fashion and fitness shoots. It reveals the body’s natural contours-waist, hips, shoulders, neck. Use side lighting to create depth and shadow. Avoid flat, even lighting-it kills the shape. Have the model engage their core to keep the spine straight. A slight turn of the head toward the camera adds connection. This pose is used in everything from swimwear catalogs to high-end art books because it’s honest, elegant, and powerful.
Why These Poses Work
These ten poses aren’t random. They all follow the same principles: balance, flow, and intention. They avoid stiffness by allowing natural body movement. They use the camera’s perspective to enhance-not distort-the model’s form. And they give the photographer clear visual anchors to build around.
Mastering these doesn’t mean you’ll use all of them in every shoot. But knowing them means you can adapt quickly. When a model feels unsure, you can guide them with confidence. When the light changes, you can pivot to a pose that still works. These are your go-to tools when creativity stalls.
Common Mistakes to Avoid
Even pros mess up. Here’s what to watch for:
- Arms looking like chicken wings-keep elbows slightly bent, never locked.
- Flat feet-have the model shift weight or point toes slightly to add tension.
- Staring into the lens-too much eye contact feels aggressive. Soft, indirect gaze often reads better.
- Over-posing-if it looks like a yoga pose, it’s probably too forced. Realism beats perfection.
- Ignoring the background-a great pose can be ruined by clutter. Always check the edges of the frame.
Practice Makes Permanent
Don’t just memorize these poses-practice them. Do a 15-minute session with a friend or model. Try each pose, then tweak it. Change the lighting. Change the angle. See how small adjustments change the mood.
Keep a notebook. Write down what worked and what didn’t. Over time, you’ll start seeing poses in everyday life-a person waiting for a bus, a child on a swing, a couple laughing on a bench. That’s when you know you’ve internalized them.
Final Tip: Let the Story Lead
The best pose isn’t the most complex one-it’s the one that serves the story. Are you selling a product? Highlight the silhouette. Are you capturing emotion? Use the over-the-shoulder glance. Are you showing strength? Go for the back arch. Let the purpose of the shoot guide your pose selection.
When you stop thinking about poses as tricks and start seeing them as tools for storytelling, your photos stop looking like photos. They start feeling like moments.
What’s the easiest pose for beginners to try?
The seated lean is the most beginner-friendly. It’s natural, requires minimal movement, and works with almost any outfit. Just have the model sit on the edge of a chair, lean forward slightly, rest one hand on their knee, and look toward the camera. Keep the spine straight and avoid slouching. It looks effortless and works in both casual and formal settings.
Do poses differ between male and female models?
The core poses work for everyone, but the execution changes slightly. Men often benefit from broader stances, stronger shoulder lines, and more grounded weight distribution. Women often use more curves and soft angles. But the best poses focus on the person’s natural shape, not gender stereotypes. A man can use the over-the-shoulder glance just as effectively as a woman. The goal is authenticity, not conformity.
How do I get a model to relax during a shoot?
Talk to them like a person, not a prop. Play music they like. Give specific, positive feedback: "That shoulder angle looks great," not "You’re doing good." Let them move freely at first-don’t correct too soon. Sometimes, the best poses come when they’re not trying. Take a few test shots and show them the results. Confidence builds fast when they see themselves looking good.
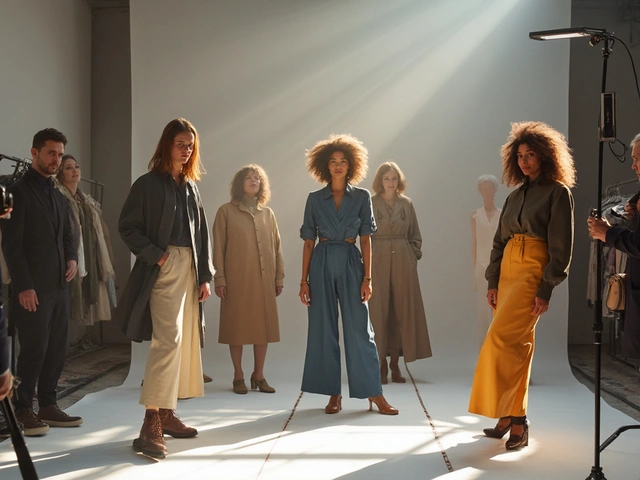
Can I use these poses for group photos?
Absolutely. Just adapt them. For two people, have one do the seated lean while the other stands behind with a hand on their shoulder. For three, use the full-body profile with staggered heights. Group shots work best when each person has a slightly different pose-avoid identical stances. The goal is unity without sameness.
What camera settings work best for posing shots?
Use a wide aperture-f/2.8 to f/5.6-to blur the background and keep focus on the pose. Set your shutter speed to at least 1/200s to avoid motion blur, especially if the model is moving. Keep ISO low (100-400) for clean images. If shooting outdoors, shoot during golden hour for soft, flattering light. Always check your focus on the eyes, not the pose.

November 13, 2025 AT 00:49
Harshad Hisham
The seated lean is such a lifesaver for beginners. I used to stress over getting models to look "perfect" until I realized simplicity wins every time. Just a slight forward lean, relaxed shoulders, and boom - natural energy. No need to overthink it. Works with jeans, suits, even pajamas.
Also, the over-the-shoulder glance? Pure magic with morning light. No filters needed.
November 14, 2025 AT 08:18
Jarvis Norman
lol okay but who even uses the hand-on-head pose anymore? its so 2012. i saw a model do this at a mall shoot and it looked like she was about to get a migraine. also why are all these poses for women? men dont need to look "soft". just point the camera and tell em to stand like a man. shoulders back, chin up, no fluff. done.
November 14, 2025 AT 14:50
Lisa Nono
I love how the back arch isn’t just about curves - it’s about power. I’ve used it for maternity shoots too, and it turns vulnerability into strength. The key is letting the model breathe into it, not force it. And honestly? The crossed-legs standing pose is underrated. It’s the quiet confidence of a woman who knows she doesn’t need to fill the frame to own it.
Also, I’ve never met a model who didn’t relax more after I said, "That’s it - you’re doing great. Just be you." No posing required.
November 15, 2025 AT 05:05
Bhatti Naishadh
Western poses. Weak. Indian classical dance has 108 mudras - each tells a story. Why copy poses from statues that are 2000 years old? We had posture before you had cameras. Real strength is in silence, not S-curves.
November 16, 2025 AT 14:52
Pierce Burbank
YES! The walking motion is EVERYTHING - and I can’t stress this enough: use a fast shutter speed, yes, but also TELL THE MODEL TO WALK LIKE THEY’RE GOING TO MEET SOMEONE THEY LOVE. Not like they’re on a runway. That’s the difference between a photo and a moment.
Also - arms like chicken wings? YES. I’ve seen it a hundred times. Bend those elbows! Let them hang like they’re carrying a bag of groceries. Real life > perfect pose.
And for the love of light - check your background! A trash can in the corner ruins everything. Always, always, always check the edges!
November 18, 2025 AT 03:28
Alex Burns
Wait - did anyone notice the typo in the back arch section? It says "avoid collapsing in the lower back" - but then later says "engaging the core" - which is correct - but the wording is confusing. Also, "boudoir" is spelled right but it’s easy to miss. Small things matter.
Also, the hand-in-hair pose? I tried it with my cousin last weekend. She was nervous, so I said, "Just pretend you’re adjusting your hair after a windy walk." She laughed, did it naturally, and we got the best shot of the day. No posing. Just real life.
November 20, 2025 AT 01:34
Debasish Maulik
These poses aren’t just techniques - they’re invitations. Every curve, every glance, every lean is an invitation for the viewer to feel something. Not to admire - to connect.
I’ve taught this to kids in rural India. No fancy gear. Just a phone, a wall, and a smile. The seated lean? They got it instantly. Because it’s not about fashion. It’s about dignity. About saying, "I am here. I matter. Look at me - not at my clothes, not at my background - at me."
And that’s why this list works. It doesn’t ask people to become something. It lets them become more of themselves.
Also - the final tip? Perfect. The story leads. Not the pose. Not the lighting. Not the gear. The story. Always the story.