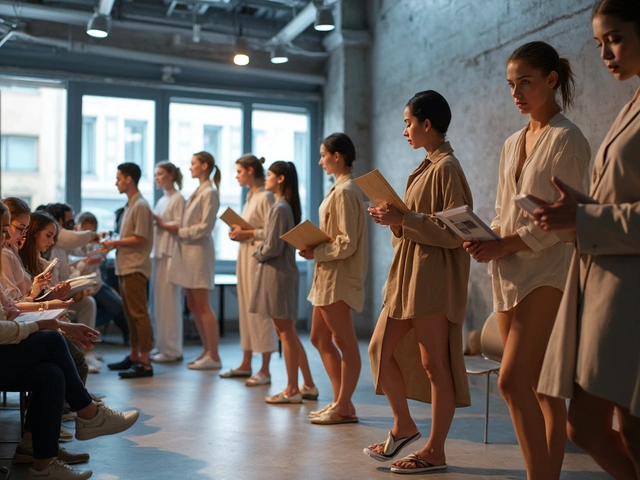
Ever looked at a fashion spread and felt like you were watching a short film? That magic happens when a Model photoshoot is built around a clear narrative that guides every choice from lighting to wardrobe. In this guide we’ll walk through the whole process - from the first spark of an idea to the final edit - so you can craft shoots that speak, not just show.
Why Narrative Beats Pure Aesthetics
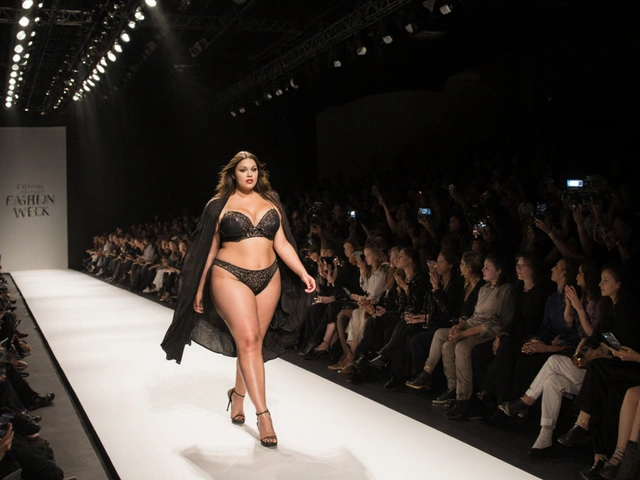
People remember stories far better than isolated images. A well‑crafted narrative gives viewers a reason to stay, follow the visual thread, and feel an emotional pull. Think of a runway show that tells a story of rebellion versus a collection that merely displays clothes; the former sticks in the mind because it connects on a human level.
Step 1: Define the Core Narrative
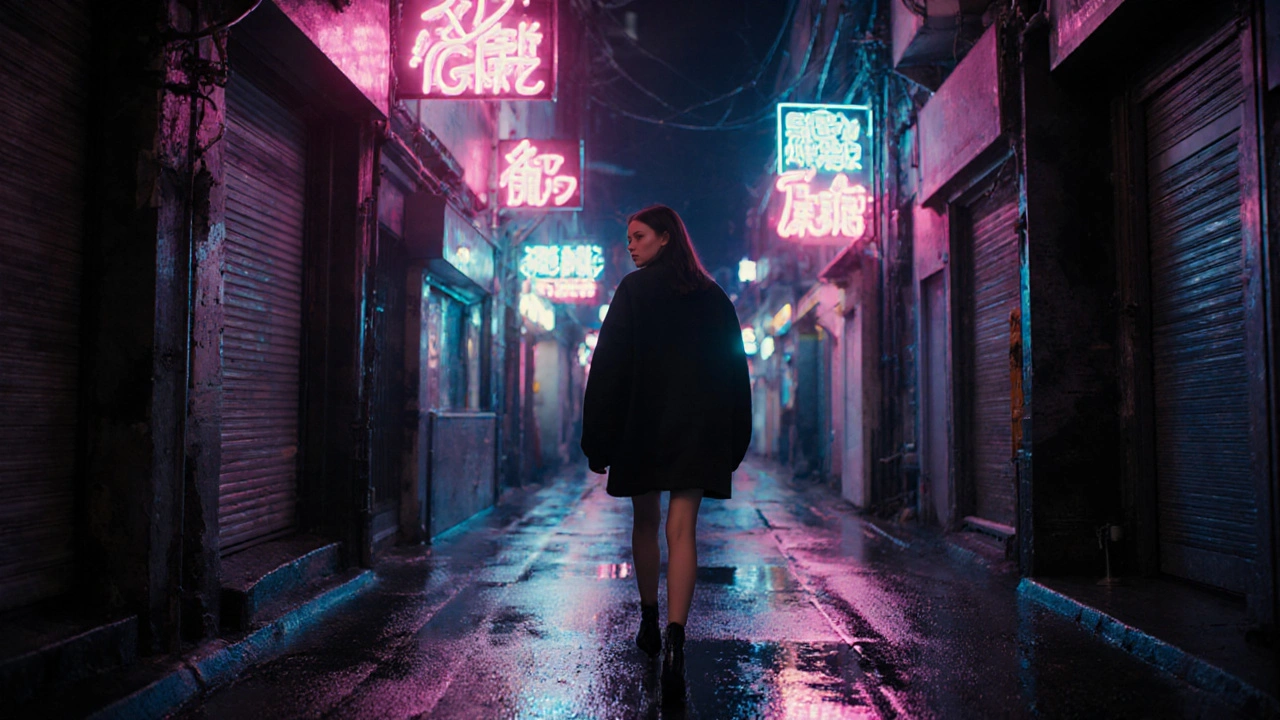
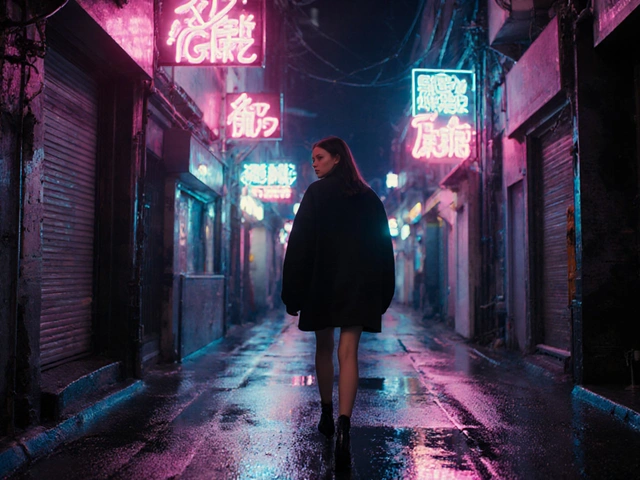
Start with a simple sentence that captures the mood you want to convey. For example: “A young artist navigating the neon streets of Tokyo after sunset.” This sentence becomes the Narrative the central story that informs every visual decision in a shoot. Keep it concise - 10‑15 words - so the whole team can reference it instantly.
Step 2: Build a Mood Board
A mood board translates the narrative into visual cues: color palettes, textures, reference images, and even music snippets. Use tools like Pinterest or Milanote to collate inspiration. When you see a muted pastel palette paired with gritty concrete textures, you’re already deciding how the story will feel on camera.
Step 3: Craft a Storyboard
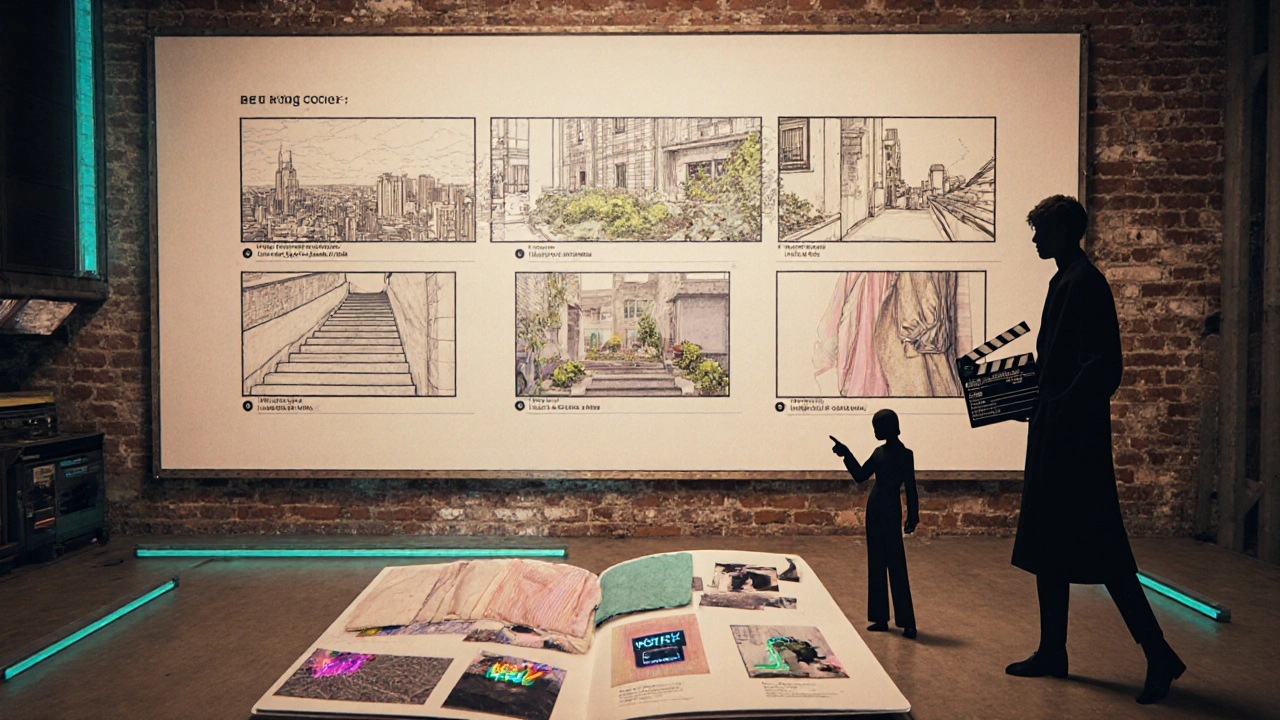
Storyboard Storyboard a sequence of sketches or thumbnail images that map out the flow of a photoshoot turns the abstract narrative into concrete frames. Sketch out 5‑7 key shots that cover the beginning, conflict, and resolution of your story. Even rough pencil sketches help the photographer, model, and stylist stay on the same page.
Step 4: Choose the Right Location
Location scouting is the bridge between imagination and reality. If your narrative is set in “neon Tokyo,” look for downtown alleyways, underpasses, or rooftop bars that already have vibrant signage. Visit the site at the intended shoot time to check natural light, foot traffic, and any permits you might need.
Step 5: Plan Lighting to Match Mood
Lighting can turn a dull street into a cinematic playground. For a moody, night‑time vibe, use a mix of practical light sources (neon signs, street lamps) and controlled strobes with gel filters to mimic the color temperature of the environment. When the story calls for romance, softer diffused light from large softboxes can create a dreamy glow around the model.
Step 6: Wardrobe Styling as Character Development
Clothing is the visual shorthand for personality. A rebellious narrative might feature oversized jackets, ripped denim, and chunky sneakers, while a high‑society plot leans on tailored suits and silk gowns. Work with a stylist who understands the story beats - they should be able to explain why a certain accessory “reveals” a character trait.
Step 7: Direct the Model Like an Actor
Models aren’t just poses; they’re performers. Brief the model on the story arc: what they’re feeling, why they’re looking away, or what secret they’re holding. Use language that evokes emotion: “Imagine you just received a surprising invitation. Let that anticipation show in your eyes.” This approach yields authentic expressions that connect with viewers.
Step 8: Capture Sequential Shots
During the shoot, think in terms of a film. Capture establishing shots, close‑ups that reveal details, and mid‑shots that move the story forward. Use a continuous shooting mode for movement sequences, and don’t be afraid to take extra frames - you’ll need options when assembling the final narrative.
Step 9: Post‑Production - Stitching the Story Together
In post you’ll decide the final pacing. Choose a consistent color grade that reinforces the mood - cool blues for melancholy, warm oranges for nostalgia. Consider adding text overlays or subtle graphic elements that hint at plot points, but keep them minimal to let the images speak.
Quick Checklist for Narrative Photoshoots
| Element | Key Question | Typical Task |
|---|---|---|
| Narrative | What story am I telling? | Write a one‑sentence hook |
| Mood Board | What visual cues support the story? | Collect colors, textures, references |
| Storyboard | Which shots map the arc? | Sketch 5‑7 key frames |
| Location | Where does the story unfold? | Scout, photograph, secure permits |
| Lighting | How does light shape mood? | Plan sources, gels, modifiers |
| Wardrobe | What does clothing say about the character? | Style outfits, coordinate accessories |
| Model Direction | How to get authentic emotion? | Give backstory, cue emotions |
| Post‑Production | How to cement the narrative? | Color grade, sequence, minor graphics |
Common Pitfalls and How to Dodge Them
- Over‑styling: Loading every shot with accessories can distract from the story. Keep props purposeful.
- Ignoring Light: Even the best concept falls flat without lighting that matches the tone. Do test lights on location.
- Flat Model Direction: Stiff poses break immersion. Encourage movement and spontaneous reactions.
- Skipping the Storyboard: Without a visual plan you’ll waste time shooting irrelevant frames. A quick sketch saves hours.
- Post‑Production Over‑Edit: Heavy filters can obscure the narrative’s subtle cues. Aim for consistency, not gimmick.
Real‑World Example: "Urban Dreamer" Shoot
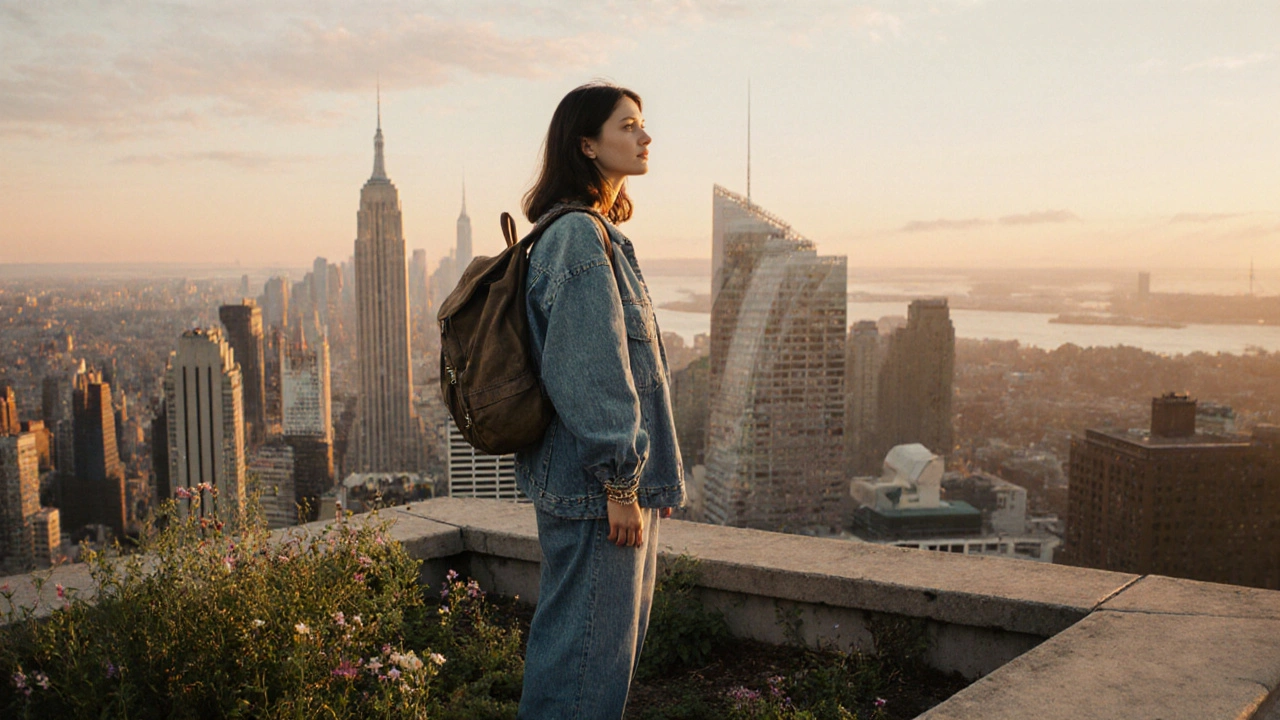
We recently partnered with a rising fashion brand for a campaign titled “Urban Dreamer.” The narrative: a college student who discovers a hidden garden atop a city rooftop. Here’s how we applied the steps:
- Defined the narrative in a single line - “A day‑dreamer escapes the concrete jungle for a secret garden.”
- Created a mood board with soft greens, rusty metal, and sunrise lighting.
- Storyboarded six shots: cityscape establishing, stair climb, first glimpse of foliage, interaction with flowers, reflective moment, and final walk away.
- Scouted an industrial loft with a rooftop that had a real garden patch; secured a night permit.
- Used a mix of natural sunrise light and a portable LED panel with a warm gel to mimic early morning hues.
- Styled the model in oversized denim, a vintage backpack, and minimal jewelry to hint at a carefree vibe.
- Directed the model to move slowly, eyes wide, as if discovering something magical - we played ambient city sounds to get into character.
- Post‑production involved a gentle teal‑orange split toning to emphasize the juxtaposition of concrete and nature.
The final editorial spread felt like a short film frozen in frames, and the brand reported a 42% increase in engagement compared to their previous product‑only campaign.
Takeaway: Make Your Photos Speak
Storytelling isn’t a buzzword; it’s a proven way to make fashion images memorable. By treating a model photoshoot like a short narrative - complete with a script, a set, and a director’s eye - you give every pixel purpose.
How detailed should my narrative be?
Aim for one clear sentence that captures the core conflict or mood. Too much detail can overwhelm the team; a concise hook is easy to reference and keeps the shoot focused.
Do I need a professional storyboard for every shoot?
For simple concepts, a rough sketch or a list of shot ideas works fine. Complex narratives with multiple locations or characters benefit from a detailed storyboard to avoid confusion.
What lighting gear is essential for storytelling?
At minimum, a portable LED light with adjustable color temperature and a softbox or diffuser. Add gels or practical light sources (like street lamps) to match the story’s ambience.
How much post‑production editing is too much?
Editing should enhance, not rewrite, the story. Stick to color grading, minor retouching, and subtle cropping. If the images start looking like a completely different scene, you’ve over‑edited.
Can I apply these techniques to social‑media shoots?
Absolutely. Even a 15‑second Instagram Reel benefits from a clear narrative. Use the same steps - a concise hook, a quick mood board, and purposeful lighting - to make short‑form content feel cinematic.
October 25, 2025 AT 17:52
Eugene Stanley
I really appreciate the way you broke down the storytelling process, it makes the whole thing feel accessible and doable 😊. The emphasis on a single-sentence hook is spot on, it keeps the whole team aligned. Using mood boards as a visual shorthand helps a lot when pitching to clients. I also like the tip about scouting locations at the intended shoot time – saves a ton of hassle later. Thanks for sharing such a clear roadmap!
October 27, 2025 AT 02:12
Rutuja Patil
Honestly, the article feels overly simplistic, like it tries to cram an entire cinematographic syllabus into a fashion blog, which is just… ugh, pretentious. The suggestion to "write a one‑sentence hook" is cute, but in practice you end up with vague fluff, not substance. Also, the moodboard obsessive‑ness can become a waste of time, especially when designers start over‑decorating their folders, lol. I guess some people enjoy that level of detail, but most of us just want a quick visual reference, not an academic paper.
October 28, 2025 AT 11:32
Kristen Jacobsen
Love the energy behind this guide! It’s super helpful to think of a shoot like a short film – makes the whole thing more exciting. Your tip about lighting with practical sources like neon signs is gold. Keep pushing those creative boundaries!
October 29, 2025 AT 20:52
Lara Álvarez González
The framework you outlined aligns well with standard pre‑production pipelines, particularly the integration of narrative arcs into the visual development stage. By leveraging a concise logline as a narrative anchor, you effectively reduce cognitive load across multidisciplinary teams. The emphasis on iterative mood‑board curation, coupled with in‑situ lighting audits, mitigates the risk of post‑production colour‑grade discrepancies. Additionally, the storyboard’s role as a deterministic roadmap ensures shot‑list fidelity, which is crucial for time‑boxed productions.
October 31, 2025 AT 06:12
Lillie Shelton
When I first read through your step‑by‑step outline, I was reminded of the times I spent late nights rearranging my own digital archives, hoping to find that perfect visual thread that would tie everything together in a cohesive story. The notion of a single, punchy sentence acting as a narrative north star is both elegant and profoundly practical, because it gives every collaborator – from the stylists to the lighting techs – a clear, shared vision without drowning them in unnecessary detail. I especially love how you champion mood boards not just as collections of pretty images, but as functional maps that translate abstract feelings into tangible textures, colour palettes, and even auditory cues, allowing the whole team to feel the vibe before stepping onto set. The storyboard tip resonates deeply with me; even rough sketches can serve as a visual contract, ensuring that the photographer, model, and director are all humming the same melodic line, which in turn reduces costly miscommunications on shoot day. Your advice on scouting locations at the exact time of day you plan to shoot is a gem – it reveals hidden nuances in natural light that can make or break the intended mood, and it also helps you anticipate logistical challenges like foot traffic or permit requirements before they become show‑stoppers. Lighting, as you described, becomes a narrative character in its own right, capable of whispering secrets or shouting declarations depending on the colour temperature and quality you choose; this perspective transforms a technical decision into a storytelling device, which is exactly how great fashion photography should feel. Styling, too, is not just about clothing but about character development, and your examples of using oversized jackets for rebellion versus tailored suits for high‑society elegantly illustrate how wardrobe choices can instantly convey backstory without a single word spoken. Directing models like actors adds that final layer of authenticity, allowing emotions to ripple through the frame, turning static images into moving vignettes that linger in the viewer’s mind. In post‑production, the subtlety of a consistent colour grade is akin to a director’s cut – it binds the narrative threads together, ensuring the audience stays immersed rather than being jolted out by jarring edits. Overall, your guide feels like a masterclass in marrying the technical rigor of photography with the soul‑stirring power of storytelling, and I can’t wait to apply these principles on my next shoot, especially the tip about integrating ambient city sounds to help models find their inner world. Thank you for sharing such a comprehensive, yet digestible, roadmap – it truly empowers creators to craft images that speak louder than any runway tagline ever could.
November 1, 2025 AT 15:32
Geoffrey Leslie
While the article presents a solid overview, I must point out that the suggestion to "use a single sentence as a narrative hook" oversimplifies the complexity of brand storytelling. In many campaigns, a multi‑layered narrative is required to address diverse target demographics, and reducing it to ten‑fifteen words can strip nuance. Moreover, the recommendation to rely heavily on mood boards risks creating visual redundancy; a more efficient approach is to develop a concise visual brief supplemented by reference shots. Finally, the piece neglects the importance of pre‑visualization software, which can dramatically streamline the storyboard phase.
November 3, 2025 AT 00:52
Cheyenne M
Look, the whole "storytelling" hype is just a marketing ploy pushed by the elite to keep us chasing narratives that they control. They want us to believe that a neon sign can convey authenticity, but it's all a distraction from the real agenda: surveillance through visual data. The article never mentions how lighting rigs can be equipped with tracking sensors, turning every shoot into a data‑harvesting operation. Wake up, people.
November 4, 2025 AT 10:12
Jessica Buchanan-Carlin
Nice guide, but looks like a copy‑paste job.
November 5, 2025 AT 19:32
Tolani M
I love how you weave cultural context into the visual narrative, especially when you talk about scouting locations that reflect the story’s heritage. As someone who mentors young creatives across continents, I’ve seen first‑hand how inclusive location choices can make a campaign resonate globally. Your emphasis on lighting that mirrors the environment’s emotional tone reminds me of the power of colour psychology in different cultures – warm tones often evoke hospitality in African contexts, while cool blues can feel introspective in Scandinavian settings. When we involve local artisans in wardrobe styling, the garments become a storytelling device that honors tradition while staying fresh. The tip about using ambient sounds on set is brilliant; it helps models internalise the scene’s atmosphere, turning a static pose into a lived experience. Overall, your guide is a valuable toolkit for anyone looking to bridge the gap between fashion and narrative depth.
November 7, 2025 AT 04:52
Michael J Dean
Great article! It really highlights how a well‑crafted story can turn a simple fashion spread into something memorable. I especially liked the part about using a concise hook to keep the whole team on the same page – it’s a game‑changer for collaboration. Also, the suggestion to test lighting on location before the shoot saved me a ton of time on a recent project. Thanks for sharing these practical tips!