Capturing Best Shots: Simple Tips to Nail Every Model Photo
Ever wonder why some model pictures pop while others fall flat? It often comes down to a few practical choices you make before and during the shoot. Below you’ll find straight‑forward advice that any photographer can apply, no matter the budget.
Prep and Gear
Start by checking your gear. A fully charged battery, clean lens, and enough memory cards save you from scrambling mid‑session. Choose a lens that matches your space – a 50mm works great for portraits, while a 24‑70mm gives flexibility for full‑body shots. Pack a small reflector or a white sheet; it’s cheap and instantly improves lighting.
Know the location. Visit the spot at the same time you plan to shoot so you can see how the natural light behaves. If you’re shooting indoors, turn off harsh overhead lights and use softboxes or LED panels that mimic daylight. A quick test shot lets you adjust white balance and exposure before the model steps in.
Lighting and Angles
Light is the real star of any photo. Soft, diffused light reduces shadows on the face and highlights the model’s features. Position the main light at a 45‑degree angle from the model’s face and bounce it off a reflector opposite to fill in shadows. If the sun is too strong, shoot in the shade or use a sheer curtain to filter it.
Angles affect how the body looks. Shooting slightly above eye level elongates the neck and slims the chin. For a dramatic look, try a low angle with the model looking up; it adds power and depth. Experiment with tilt – a slight camera tilt can give a dynamic, fashion‑forward vibe.
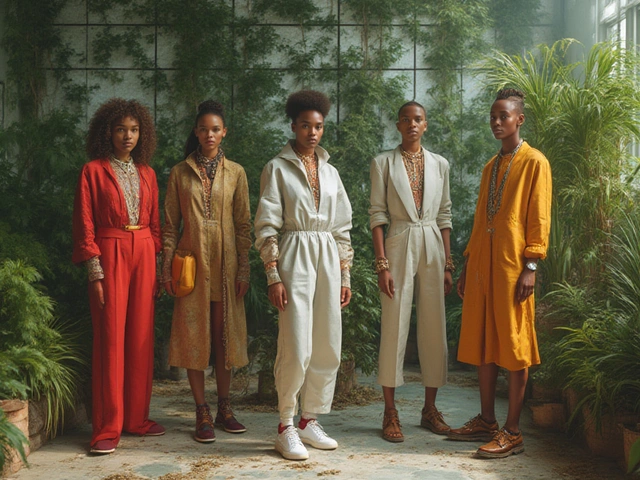
Don’t forget background. A clutter‑free backdrop keeps the focus on the model. If you’re in a city street, look for a plain wall or use a shallow depth of field to blur the scene behind.
Communicate clearly with the model. Give simple directions like “turn your shoulders slightly left” or “look over your shoulder.” Demonstrate the pose if you can; it helps the model understand the angle you’re after.
Pose basics matter. Ask the model to shift weight onto one leg for a natural stance, and let the other leg relax. Keep arms away from the body to avoid flattening them – a gentle bend creates shape. Encourage facial expressions that match the mood, whether it’s a relaxed smile or a fierce stare.
Avoid common mistakes. Don’t rely on auto‑focus alone; manually focus on the eyes for crisp portraits. Watch out for harsh shadows under the nose or chin – a small reflector can fix that instantly. Also, keep moving; if you feel the session dragging, change the pose or angle to keep energy high.
After the shoot, backup all images and review them on a larger screen. Flag the best shots and delete the obvious repeats. Basic post‑processing – tweaking exposure, adjusting contrast, and sharpening eyes – can elevate a good photo to great.
Finally, build a reference folder of your favorite lighting setups and pose ideas. When you need to capture best shots fast, you’ll have a go‑to list instead of starting from scratch.
With these simple steps – gear check, light control, smart angles, clear communication, and quick editing – you’ll consistently capture sharp, engaging model photos without overcomplicating the process.
 24 March 2025
Model Portfolio Photography: Capturing Your Best
Model portfolio photography is key to showcasing your modeling potential. It's about capturing your best angles, expressions, and styles. Whether you're just starting or updating your portfolio, understanding the process and benefits can make a significant difference. Discover how to find the right photographer and what to expect during a shoot. Get tips on how to prepare and make the most of your photography session.