Standing in front of a camera isn’t just about looking pretty. It’s about controlling your body like an instrument-every angle, every shift in weight, every glance matters. If you’ve ever looked at a photo and thought, Why does she look so effortless?, the answer isn’t luck. It’s technique. Professional models don’t wing it. They rehearse. They study. They break down poses like dancers break down steps.
Understand Your Body’s Natural Lines
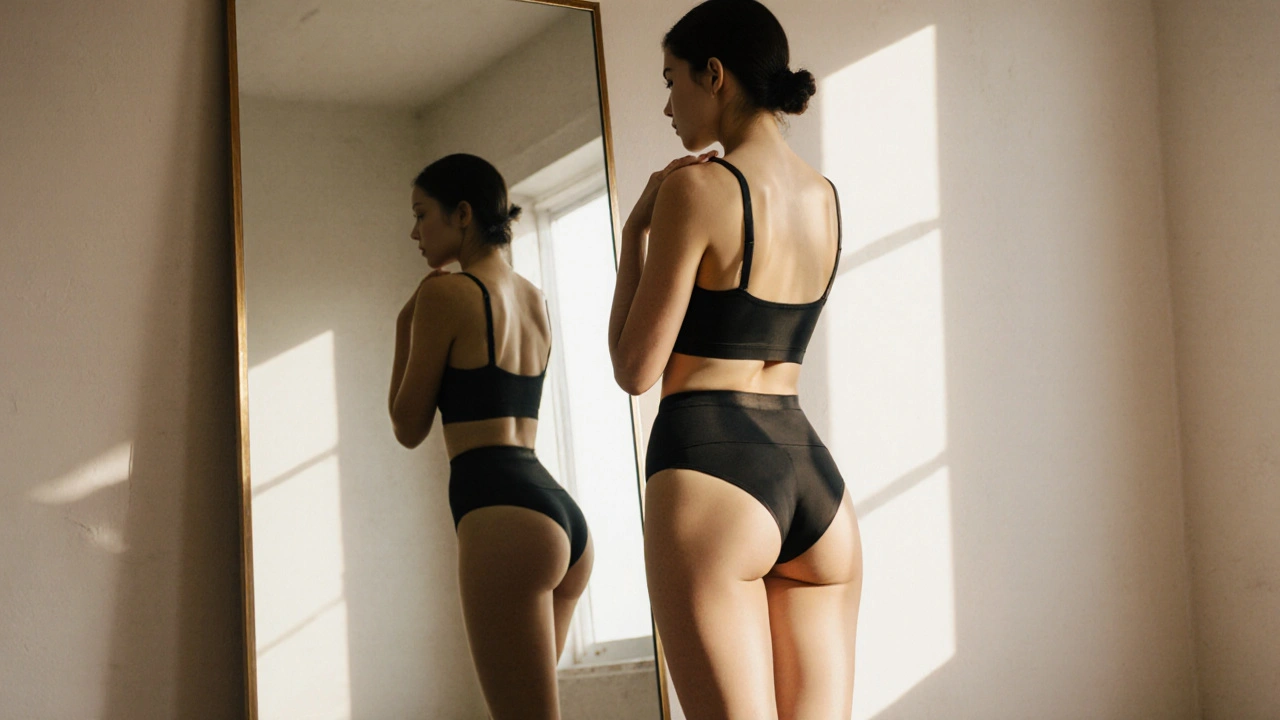
Your body has natural lines that flatter or flatten depending on how you move. The goal isn’t to look like someone else-it’s to amplify what’s already there. Start by standing in front of a mirror. Look at your silhouette. Where are your strongest curves? Where do your shoulders taper? Do your hips sit higher on one side? These aren’t flaws. They’re features.Most beginners try to copy poses they see online, but that often looks stiff or unnatural. Instead, find your own flow. Try this: Stand with your feet hip-width apart. Shift your weight onto one leg. Let the other knee bend slightly. Tilt your pelvis forward just a touch. Now roll your shoulders back-not too far, just enough to open your chest. That’s your base. That’s your foundation. From here, every other pose builds.
Think of your body as a series of connected lines: spine, shoulders, arms, legs. When these lines are clean and intentional, the pose reads as elegant. When they’re tangled or awkward, it reads as uncomfortable. Practice holding each line for 10 seconds. Notice how your muscles engage. That’s muscle memory forming.
Master the Power of Weight Shift
One of the biggest mistakes models make is standing evenly on both feet. It makes you look flat. Static. Like a mannequin. The secret? Weight shift.When you shift your weight to one leg, your body naturally creates an S-curve. Your hip on the weighted side lifts slightly. Your opposite shoulder drops. Your torso twists just enough to create dimension. This is the foundation of almost every professional pose.
Try this drill: Stand with your right foot forward, left foot back. Put 80% of your weight on your right leg. Let your left knee relax. Now, turn your hips slightly toward the camera. Tilt your head away from your weighted side. Look over your shoulder. That’s it. You’ve just created a classic editorial pose. No fancy equipment. No assistant. Just your body and awareness.
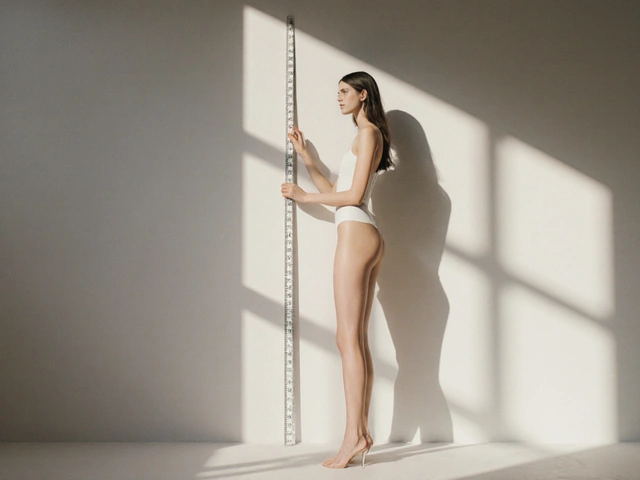
Practice this shift in different settings-on stairs, against a wall, on a curb. Notice how the angle changes when you’re higher or lower than the camera. The more you move your weight, the more dynamic your photos become.
Use Your Hands Like a Language
Hands are the most neglected part of a pose. Most models either let them hang limp or clench them like they’re holding a stress ball. Neither works.Hands tell stories. A gently curved finger suggests elegance. A relaxed open palm suggests ease. A thumb tucked into a fist suggests confidence. A hand resting on the hip doesn’t just support the body-it defines the shape of the torso.
Here’s a simple trick: Before you pose, ask yourself-what emotion am I trying to convey? Soft? Powerful? Mysterious? Then choose your hand position accordingly.
- For softness: Let your fingers rest lightly on your collarbone or trail along your thigh.
- For power: Place your hand firmly on your hip, fingers slightly spread.
- For mystery: Tuck one hand behind your back, the other near your face, fingertips grazing your cheek.
Never let your hands look like afterthoughts. They’re part of the composition. If you’re unsure, hold a small object-a scarf, a book, a glass of water. It gives your hands purpose and prevents stiffness.
Control Your Eyes and Expression
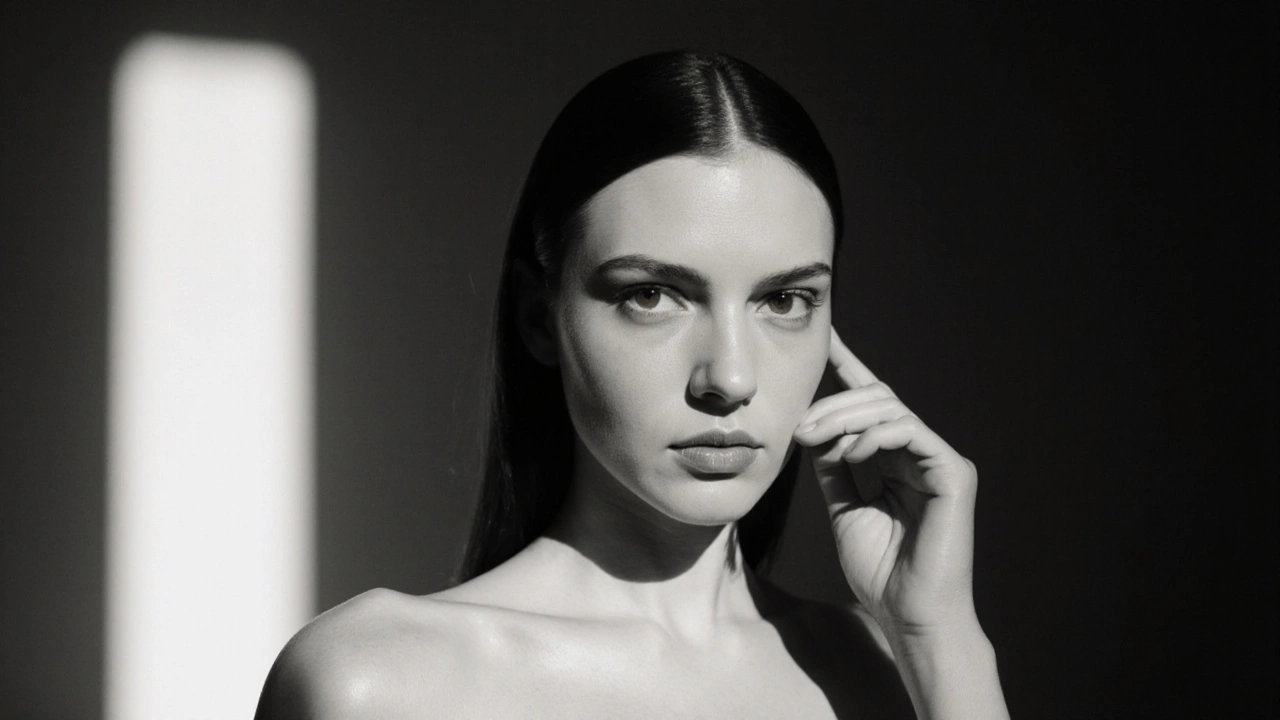
A perfect pose with a blank face is just a mannequin. A slightly awkward pose with strong eye contact can stop someone mid-scroll.Eye direction changes the entire mood. Looking directly at the camera feels bold, personal. Looking slightly away feels dreamy. Looking down creates vulnerability. Looking up adds drama.
Practice in front of a mirror with different expressions:
- Soft gaze: Let your eyelids drop just a fraction. Breathe slowly. This creates a calm, intimate vibe.
- Strong gaze: Hold your head steady. Look straight ahead. Don’t blink for three seconds. This builds intensity.
- Playful: Slightly squint one eye. Smile with your eyes, not just your mouth. This works for lifestyle and beauty shoots.
Don’t overthink the smile. Forced smiles look fake. Think of a memory that made you feel warm. Let that feeling rise. The expression will follow.
Move Between Poses Like a Flow
Photos aren’t taken in isolation. A shoot is a sequence. The best models don’t freeze in one pose and then jump to another. They glide.Think of your poses as chapters in a story. Start with a wide shot-full body, relaxed. Move to a mid-shot-torso up, hands engaged. End with a close-up-eyes, lips, texture. Each transition should feel natural.
Here’s how to practice: Set a timer for 30 seconds. Pick one pose. Hold it. Then, without breaking eye contact or losing your posture, slowly shift into the next. Don’t stop. Don’t reset. Let your body find the next shape. Repeat five times. You’ll notice your movements become smoother, more intentional.
Photographers love models who can move fluidly. It saves time. It creates variety. And it makes the final edit look like magic.
Use the Environment, Don’t Just Stand in Front of It
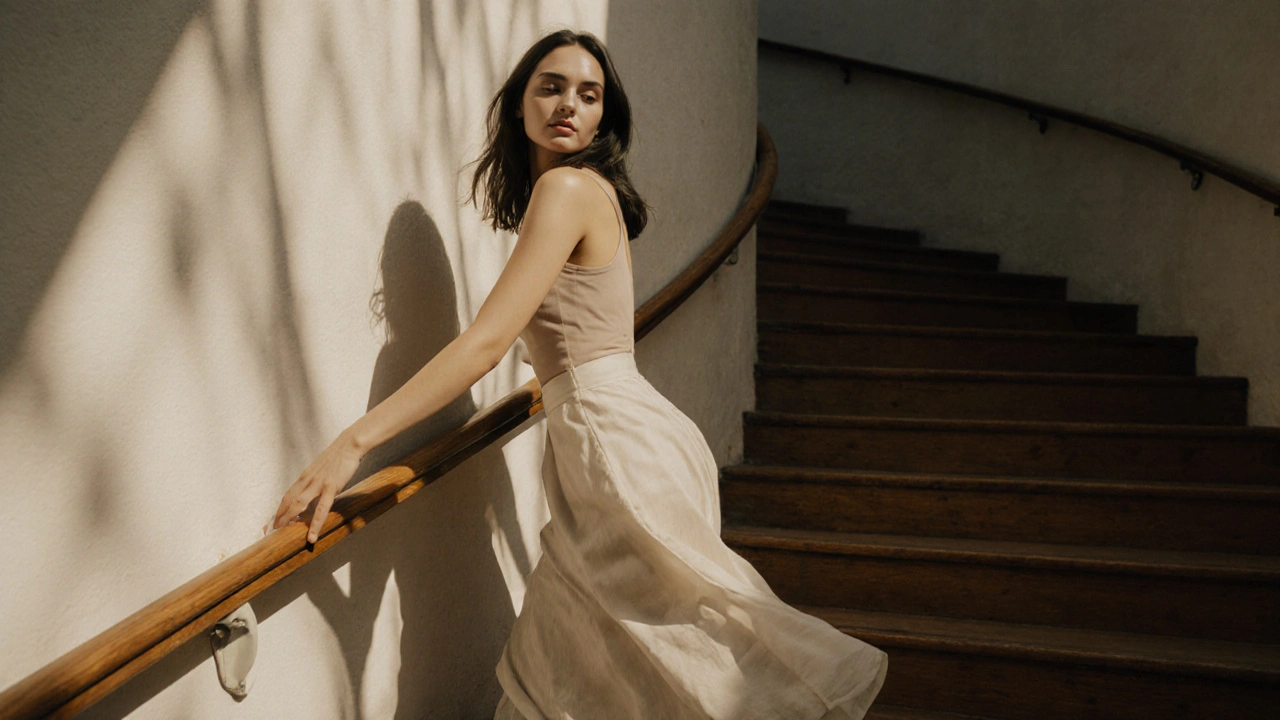
A wall isn’t just a background. A staircase isn’t just steps. A chair isn’t just furniture.Every surface can become part of your pose. Lean into a railing. Rest your foot on a step. Let your elbow rest on a windowsill. Sit on the edge of a bed and let one leg dangle. These small interactions add realism and depth.
Look for lines in the environment: railings, mirrors, shadows, fabric folds. Align your body with them. If the wall has a vertical stripe, stand parallel to it. If there’s a diagonal shadow, angle your body to follow it. Your pose becomes part of the scene-not separate from it.
Try this exercise: Find a room with one strong architectural feature-a doorway, a mirror, a column. Stand in front of it. Now, without moving your feet, shift your shoulders, arms, and head to interact with it. How does the space change the way you look? That’s the power of environment.
Practice With Purpose, Not Just Poses
You don’t need a studio to get better. You need consistency.Set aside 15 minutes, three times a week. No camera needed. Just a mirror and your phone. Record yourself shifting between five poses. Watch it back. Ask yourself:
- Where does my body feel stiff?
- Which pose looks the most natural?
- Do my hands look like they belong?
- Is my expression matching the energy of the pose?
Keep a small notebook. Write down what works. What feels awkward? What did the photographer say last time? Over time, you’ll build a personal library of poses that suit your body.
Don’t chase trends. Chase authenticity. The most powerful models aren’t the ones who copy the hottest Instagram pose. They’re the ones who’ve learned how to move with confidence-and let their own shape shine through.
Common Mistakes to Avoid
Even experienced models slip up. Here are the five most common errors-and how to fix them:- Locking your knees → Keeps your body rigid. Always keep a slight bend. It looks more relaxed and prevents dizziness.
- Flaring your elbows → Makes your torso look wider. Keep elbows slightly tucked, pointing down or back.
- Looking at your feet → Breaks the connection with the camera. Focus on a spot just above the lens.
- Over-arching your back → Creates an unnatural curve. Engage your core instead. Your spine should feel long, not pushed.
- Forgetting to breathe → Tenses your entire body. Breathe in through your nose, out through your mouth. Let your shoulders drop with each exhale.
These aren’t just tips. They’re habits. Build them slowly. One pose at a time.
Final Thought: Pose With Intent
Every pose you hold is a choice. Not just a position. A statement. Whether you’re shooting for a fashion magazine, a brand campaign, or your portfolio, your body is your voice. Learn to speak clearly.You don’t need to be tall. You don’t need to be thin. You just need to know how to use what you’ve got. That’s the real skill. That’s what separates the good from the great.
How do I find my best angles for posing?
Start by taking photos of yourself from different angles-front, 3/4, side, and back. Look for where your body looks most defined-usually where your shoulders, waist, and hips create natural lines. Most people look best at a 45-degree angle to the camera. Record yourself moving between poses and watch for where your silhouette feels strongest. Trust what you see, not what you think you should look like.
Should I always smile in model poses?
No. Smiling is just one expression among many. Editorial and high-fashion shoots often use neutral or intense expressions. Lifestyle and beauty shoots might call for warmth. The key is matching your expression to the mood of the shoot. Practice a range-from a soft smile to a serious gaze-and learn when each works. A forced smile looks unnatural. Let your expression come from emotion, not obligation.
How can I improve my posture for modeling?
Good posture isn’t about standing straight like a soldier. It’s about alignment. Imagine a string pulling the top of your head toward the ceiling. Let your shoulders relax down your back, not hunched forward. Engage your core lightly-not tight, just aware. Practice standing against a wall: heels, hips, shoulders, and head should all touch. Hold for 60 seconds. Do this daily. Over time, your body will remember how to hold itself naturally, even when you’re not thinking about it.
What if I feel awkward or uncomfortable posing?
It’s normal-even pros feel it. The difference is they’ve trained through it. Start small. Practice in private. Use a mirror. Record yourself. Don’t judge. Just observe. Focus on one small improvement at a time: hand position, weight shift, eye direction. The more you do it, the less awkward it feels. Think of it like learning to dance. At first, every step feels wrong. Then one day, you move without thinking. That’s the goal.
Do I need to be flexible to pose well?
No. Flexibility helps with certain poses, but it’s not required. Many iconic model poses rely on alignment and weight distribution, not contortion. What matters is body awareness. You can create powerful, elegant poses without touching your toes. Focus on lengthening your spine, opening your chest, and relaxing your shoulders. These are more important than being able to do a backbend.

November 3, 2025 AT 14:52
Schechter Donovan
Okay but can we talk about how the hand stuff is literally life-changing? I used to let mine dangle like dead fish until I started using a scarf like they said. Now my photos look like I’m in a Vogue spread and not a Walmart photo booth. 🙌
November 5, 2025 AT 07:54
Anant Raj Bharti
The weight shift technique is fundamental. Many beginners overlook biomechanical alignment and instead focus on aesthetics, which leads to artificial posing. The S-curve is not a stylistic choice-it is a physiological necessity for dynamic composition. Practice with a plumb line to verify spinal alignment.
November 6, 2025 AT 20:51
Meghan Horn
THIS. I cried when I finally stopped forcing smiles and just thought about my grandma’s kitchen 😭✨ Now my photos feel like me. Thank you for writing this.
November 8, 2025 AT 11:42
Franklin Lopez Silverio
Man, I used to think modeling was all about looking hot. Then I tried this 15-minute mirror routine three times a week and wow. My posture’s better, my confidence’s up, and my dog even stares at me differently now. You don’t need a runway to be a model-you just need to show up and be intentional. Keep going, everyone.
November 8, 2025 AT 15:20
Hakeem Homes
Look, I’ve seen 37,000 ‘pose tips’ videos from influencers who can’t even stand without looking like a startled flamingo. This? This is the only thing that doesn’t read like a TikTok script written by a bot. The part about breathing? Genius. The part about hands? Finally, someone who doesn’t treat them like afterthoughts. The rest of you? Stop copying ‘aesthetic’ poses and learn anatomy. Your spine will thank you.
November 10, 2025 AT 08:38
Bernard Mutua
Who authorized this? Who gave these people the right to tell women how to move their bodies? This is cultural manipulation disguised as empowerment. The camera is a tool of patriarchal control. Why are we being taught to perform for lenses instead of rejecting the system entirely? The government should ban these tutorials.
November 10, 2025 AT 10:53
Seema Donga
OMG YES!!! I tried the 45-degree angle thing and my mom actually said, ‘Honey, you look like a model!’ I cried, I hugged my phone, I posted it on Instagram, and then I cried again because it felt real!! Thank you, thank you, thank you for this!! 🙏💖✨
November 11, 2025 AT 22:39
Ty Henley
Interesting. But have you considered that most of these ‘natural’ poses are just recycled 90s supermodel tropes? Also, ‘use your hands like a language’? That’s not insight-that’s poetry for people who don’t know what a clavicle is. 🤷♂️
November 13, 2025 AT 09:22
Hannah Cranshaw
There is a fundamental flaw in the assumption that body awareness can be systematically taught. The notion that ‘muscle memory’ can be cultivated through repetitive micro-adjustments ignores neuroplasticity thresholds and individual somatic variance. Furthermore, the reliance on mirror feedback introduces perceptual bias. A more rigorous approach would require motion-capture analysis and proprioceptive calibration under controlled lighting conditions.